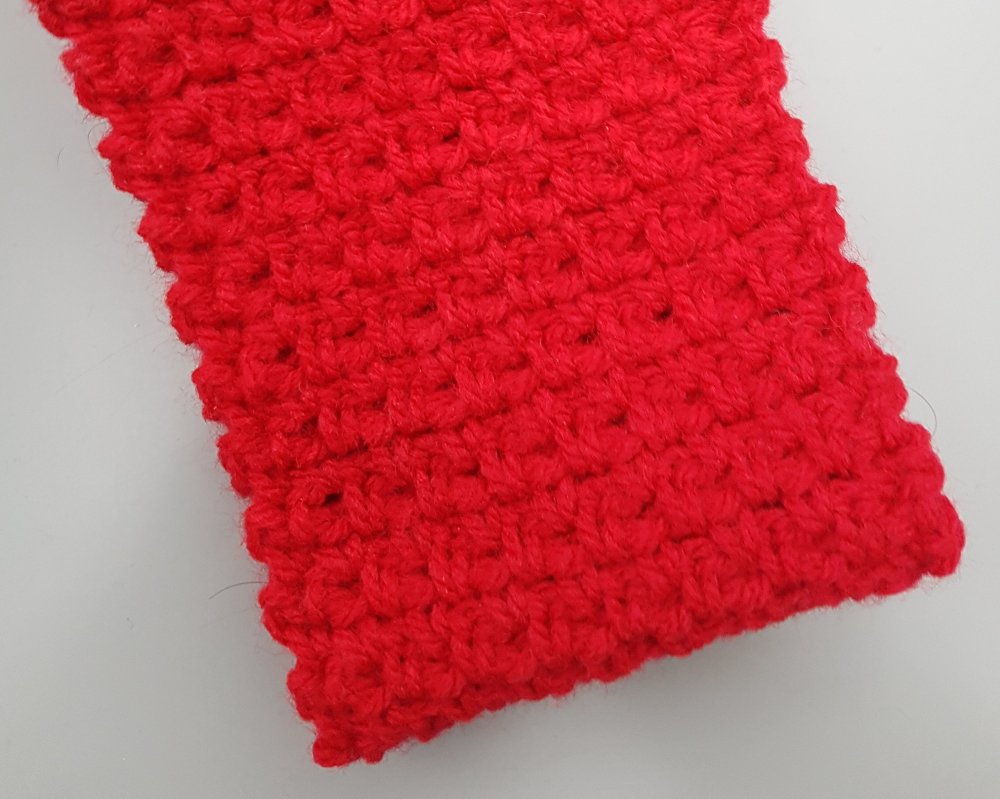
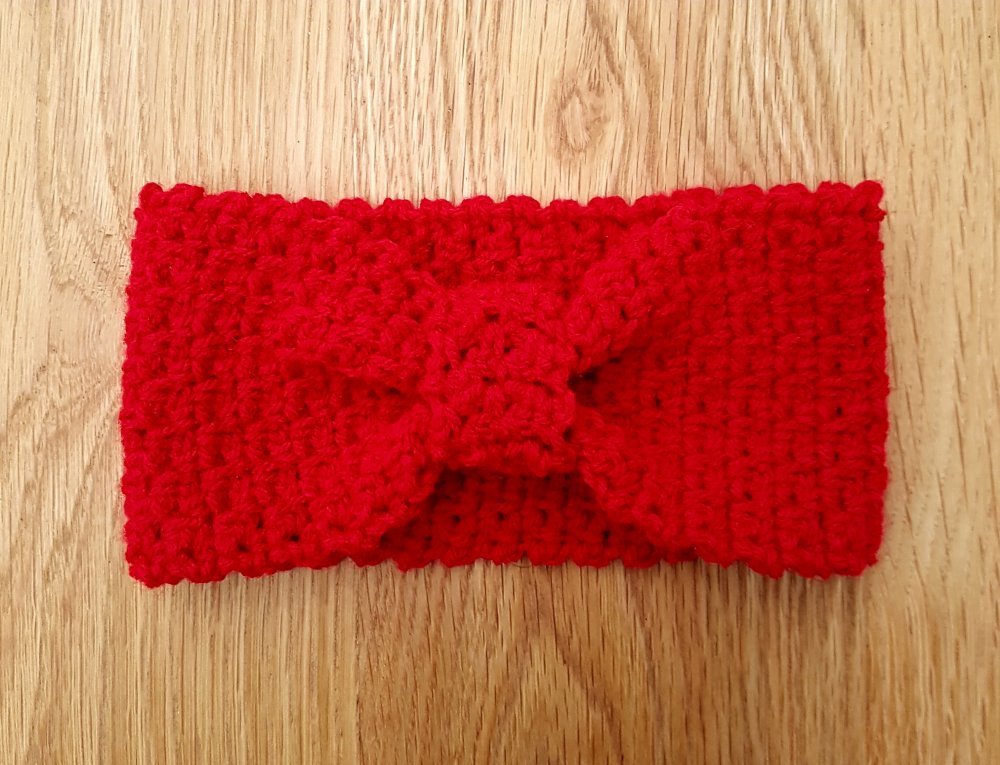
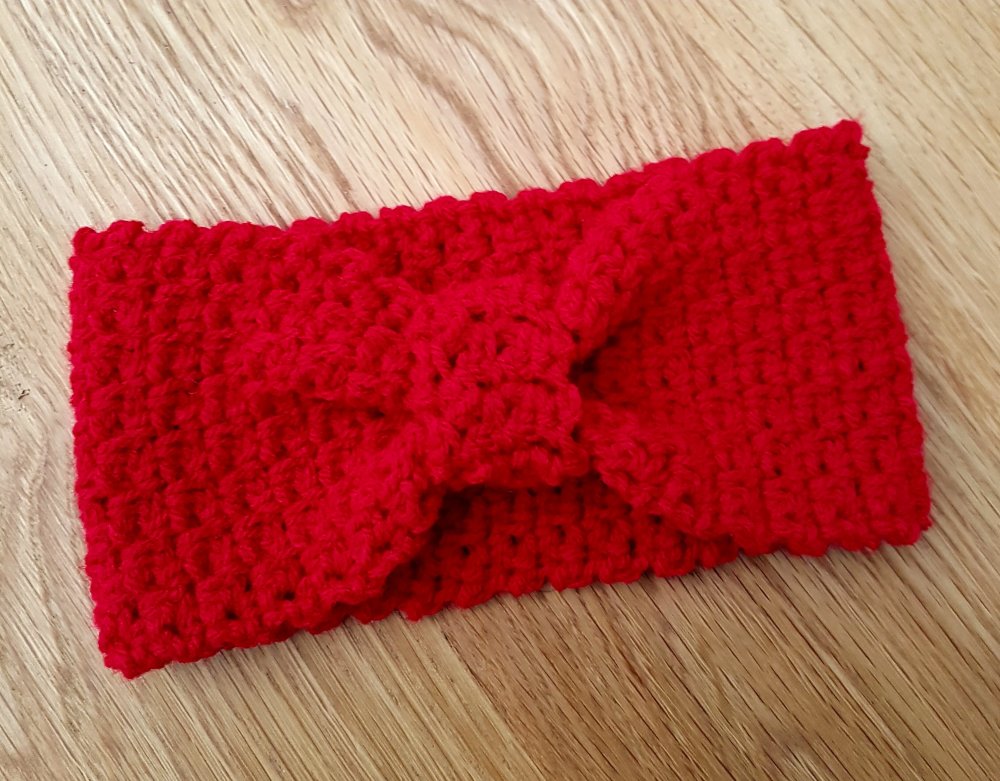
A super-quick make for kids that’s perfect for a Christmas stocking present, or to set off a Christmas outfit. Using an easy crochet moss stitch effect, it can be made in a few hours, and could easily be sized up for an adult or down for a baby. It can be worn as a headband over the hair with the bow effect at the back, or as a hairband under the hair with the ‘knot’ at the back.
Tension isn’t too crucial here, just check you end up with the right length for the size you’re making. The starting chain and length I give in the pattern is good for primary school-age: anything from 5-11 year-olds. For a baby/toddler, try decreasing the starting chain to 11sts and working to a length of 25-30cm/10-12″ (even smaller for a newborn – measure the head of the intended recipient to make sure). For an adult, use a starting chain of 17 sts and a length of 40-43 cm/16-17″. As long as you have an odd number of starting chain, you can easily size up or down. Just remember if you’re working to an actual head measurement that the finished item will be quite stretchy.
To make it fancier, add crochet flowers and leaves, or holly leaves and berries for a Christmas theme. Lucy at Attic24 has some great patterns for these as part of her brilliant Christmas wreath pattern.
Mossy bow headband
Fits a 5-11 year-old child: finished size 35 cm/14″ x 7.5 cm/3″.
You will need:
- 100g double knitting yarn
- 6.5mm hook
- Tapestry wool needle
All instructions use UK abbreviations.
Ch 15 to start.
Row 1: 1 dc into 2nd ch from hook, (1 dc into next st, 1 ch, miss 1 ch) to last st, 1 dc. 1 ch, turn. (Turning ch does not count as a stitch throughout.)
Row 2: 1 dc into first st, (1 dc into ch sp, 1 ch, miss 1 dc) to last st, 1 dc in last st. 1 ch, turn.
Continue working Row 2 until work measures 35cm/14″ (64 rows for me). Fasten off, leaving a long tail.
Use this to slip-stitch the two short ends together to make a band. Try to keep the seam as flat as possible. Weave in the ends.
For the knot, start with 7 ch.
Work in pattern as for band for 12 rows, then fasten off leaving a long tail.
Wrap around the band and slip-stitch the two short ends together. Before fastening off, and with the knot seam at the back, position the knot around the band to hide the seam, and arrange the gathers evenly. Use a couple of stab stitches to go right through the middle of the knot to hold it in place, then fasten off and weave in the ends.

One Comment Add yours